Crafting a Digital Identity
- Make a list of the social media platforms you’re active on.
- Who are you speaking to (or listening to) on each one? What communities are you participating in?
- What do you share about yourself on each platform? What do you keep private?
- Think about this class as a digital community of colleagues. What information do you want us to know about you?
Write and post a blog post introducing yourself. Include an image – that might be of yourself, of your pet, of a place you love, etc. Add the tag “Introduction” before you hit publish.
Adding A Blog Post to WordPress
- Accessing the Dashboard: Our website is https://iris.siue.edu/hum230sp25. You can access the dashboard by going to https://iris.siue.edu/hum230sp25/wp-admin and logging in with your SIUE username and password.
- Once you’re logged in, you’ll also see a banner at the top of the website that includes a link to the dashboard.
- Adding a Post: When you’ve made it to the dashboard, click on “Add New” Under the “Posts” heading to the left of your screen. You’ll be taken to a screen that looks like a word processor. You can type right into the post box, or you cut and paste directly from your own word processor into the blog screen.
- Adding a Title: Type a title in the “Add Title” Box that is informative and describes your topic.
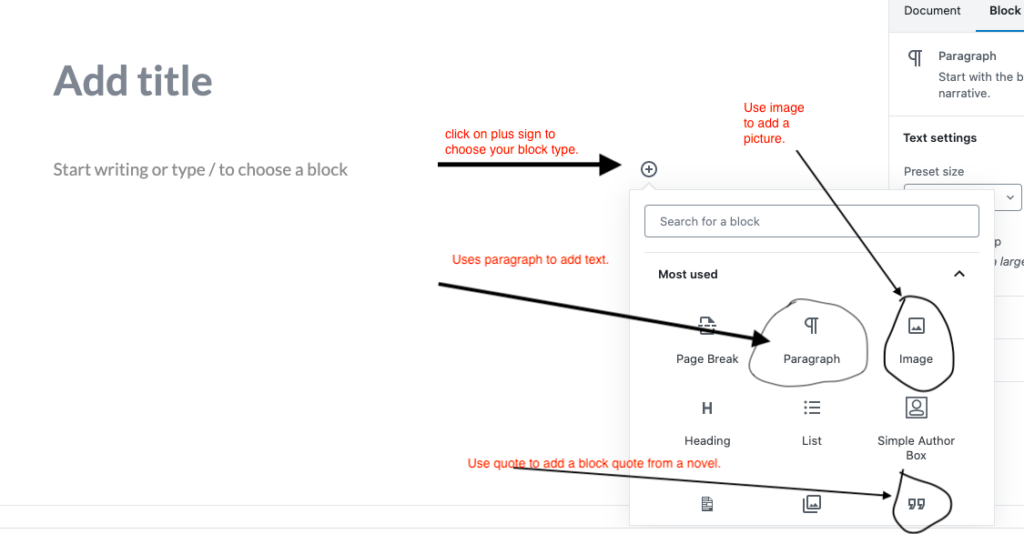
- Adding a Block with Text or Media: Click on the plus sign to choose what kind of content block you are adding. Common blocks include “paragraph” to add text, “image” to add a picture, or “quotation” to add a block quote. There are several other block types you can add, but these three are the ones you’ll likely need most often.
- Adding your post’s text: Add a paragraph block and then type your text. Note that a toolbar will pop up at the top of the screen giving you options for formatting the text.
- Adding Image: Add an “Image” block. The site will give you the option to add an image from a URL, upload one from your computer, or choose one that has already been added to the media library.
- Saving your Work: Click on “Save Draft” and then “Preview” in the widget in the upper-right hand corner to check your work (In “Improved” mode “save” and “preview” are at the left of the editor). Take your time, add to the post, and proofread.
- Publishing: Choose “Publish” from the widget at the right for the post to appear on your blog (or at the left of the editor in the “improved” version).